

This guide walks you through creating an API tool, attaching it to an agent, and testing the round-trip — all from the dashboard.
Prerequisites
- A signed-in dashboard account at app.agntix.ai.
- An existing agent (see Build your first agent).
- For API tools: a reachable HTTPS endpoint you want the agent to call. The endpoint should respond in < 1 second for voice agents to stay snappy.
Step 1: Open the Tools page
From the left navigation, click Tools. New organizations start with an empty list.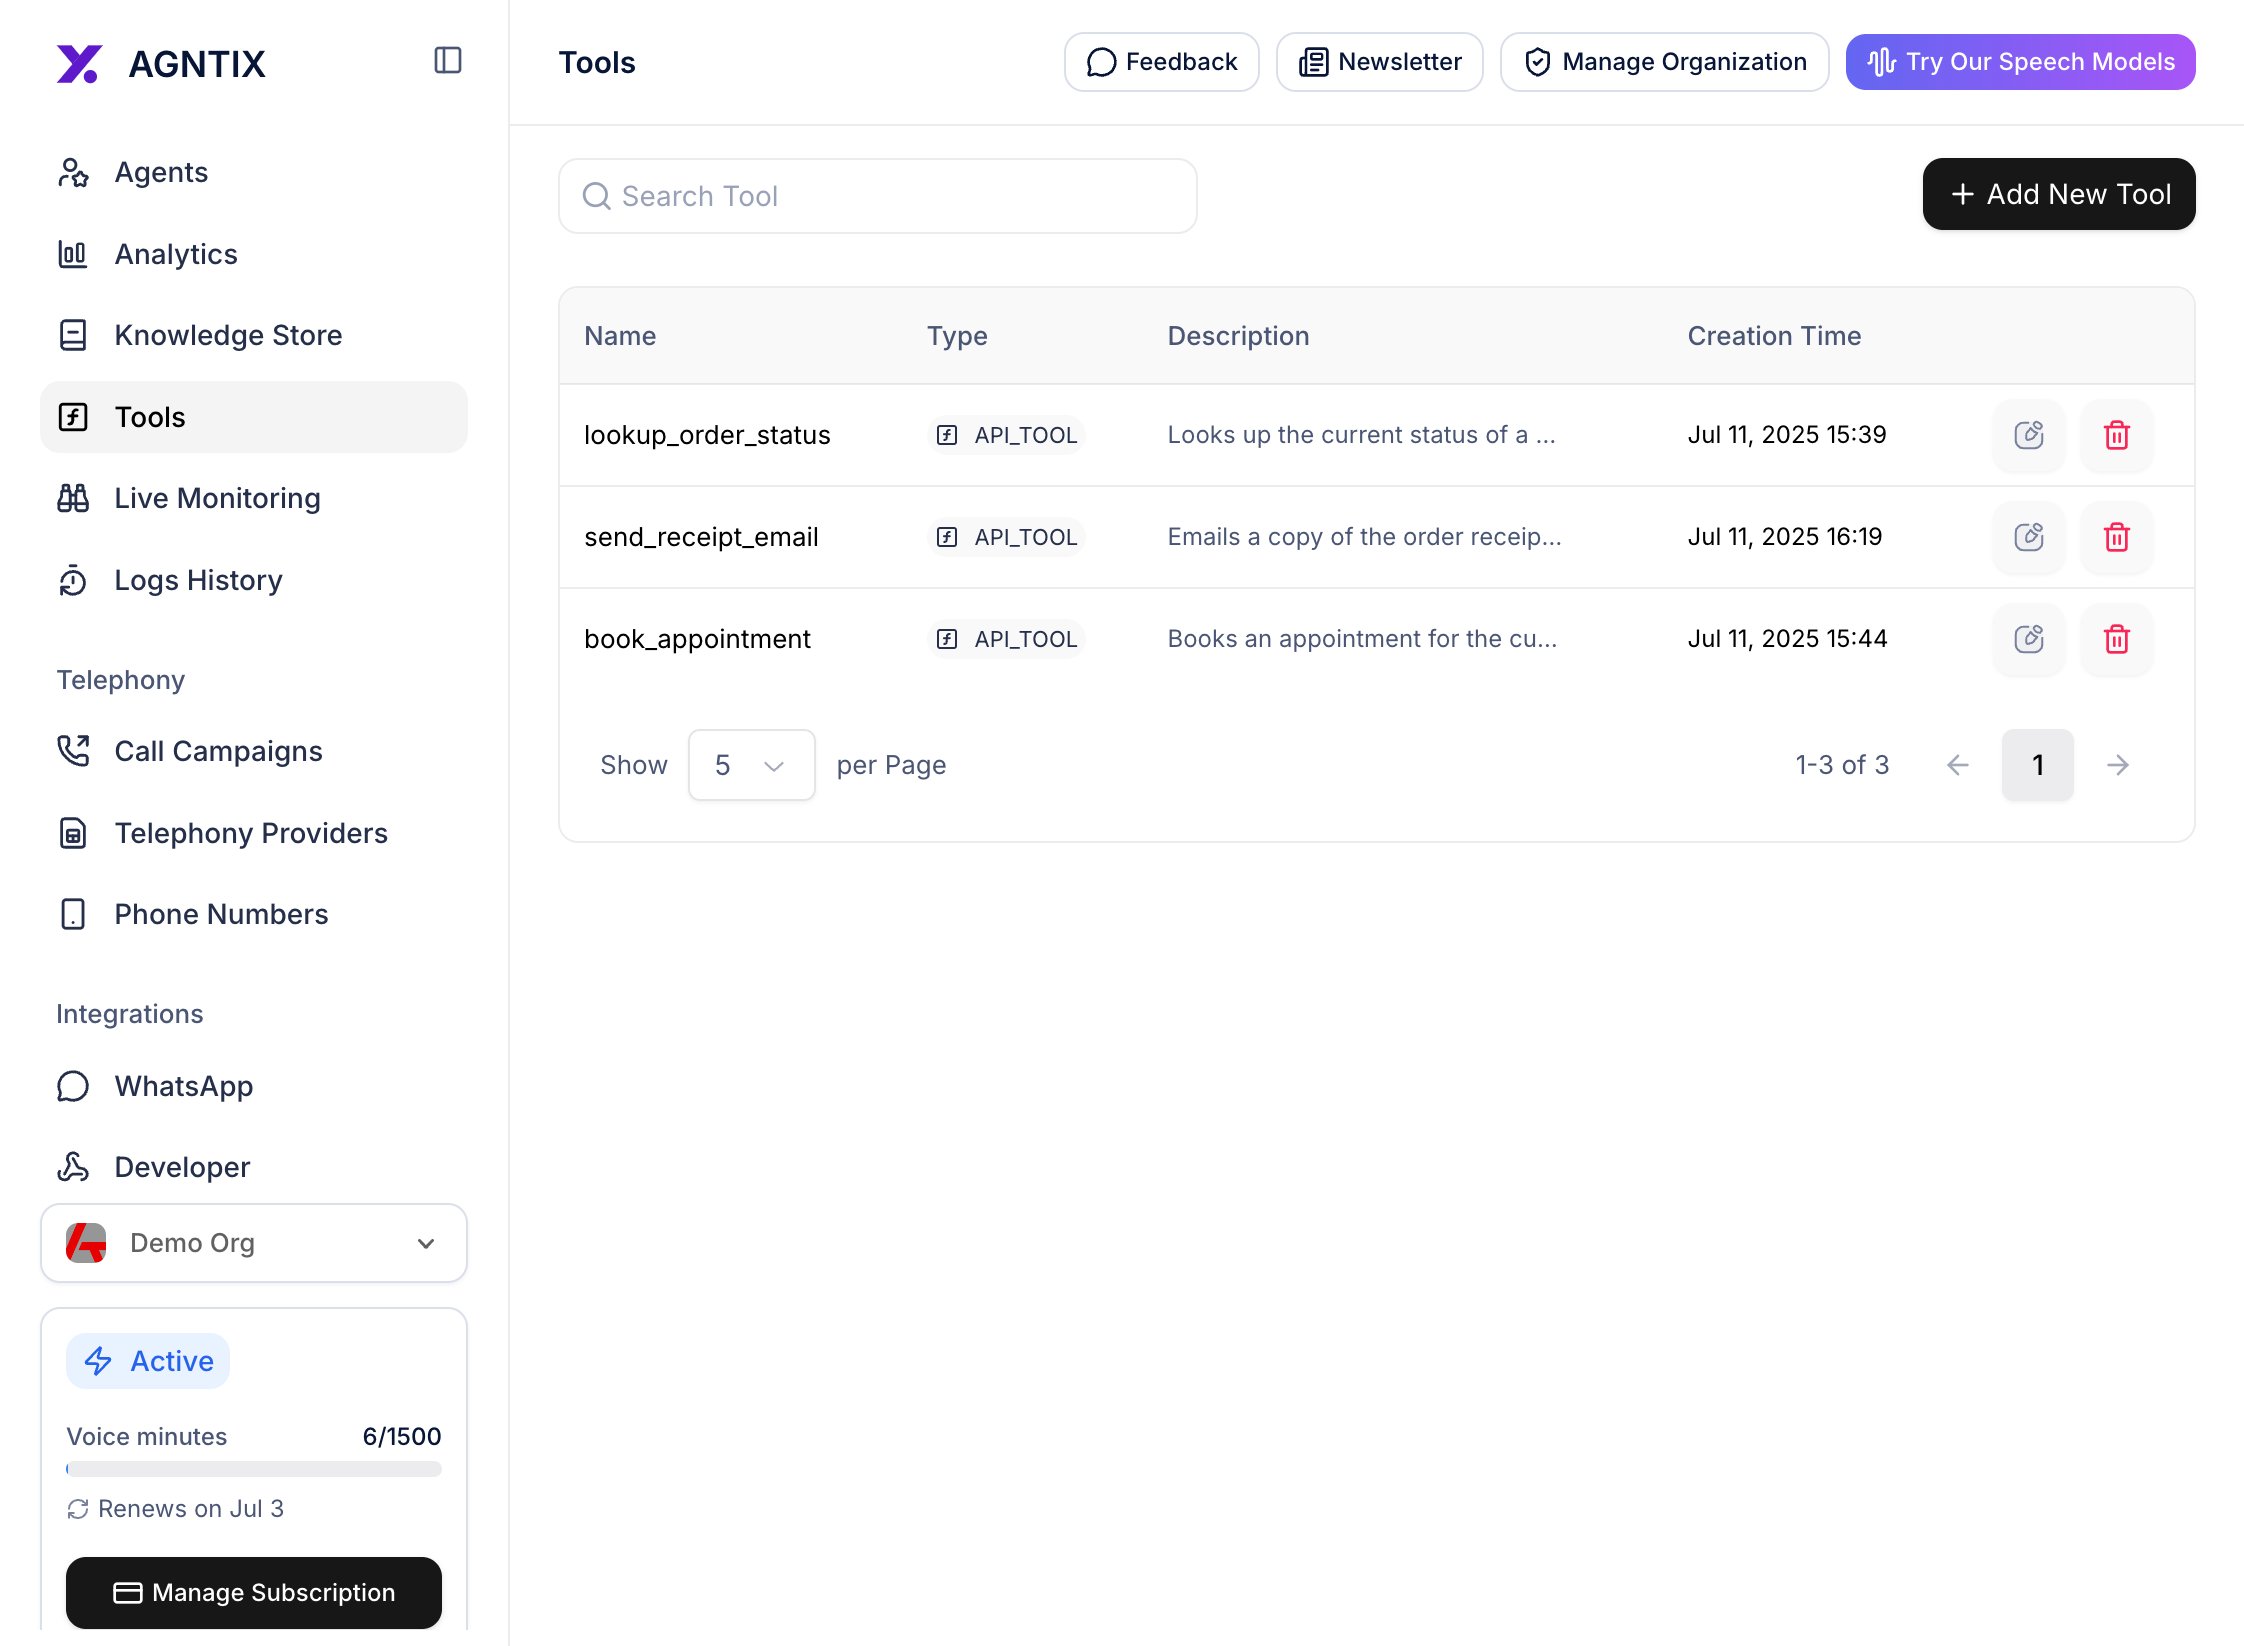
The Tools page. Click + Create Tool to start.
Step 2: Fill in the basics
The Create Tool modal collects:- Name — 8–20 chars, lowercase letters, digits, and underscores only (e.g.
lookup_order_status). The LLM sees this name verbatim — make it self-describing. - Description — what the tool does. The LLM uses this to decide when to call it — be precise. Bad: “queries orders”. Good: “Looks up the current status of a customer order by its order number. Returns status, expected delivery date, and shipping carrier.”
- Type — leave on API Tool for this guide.
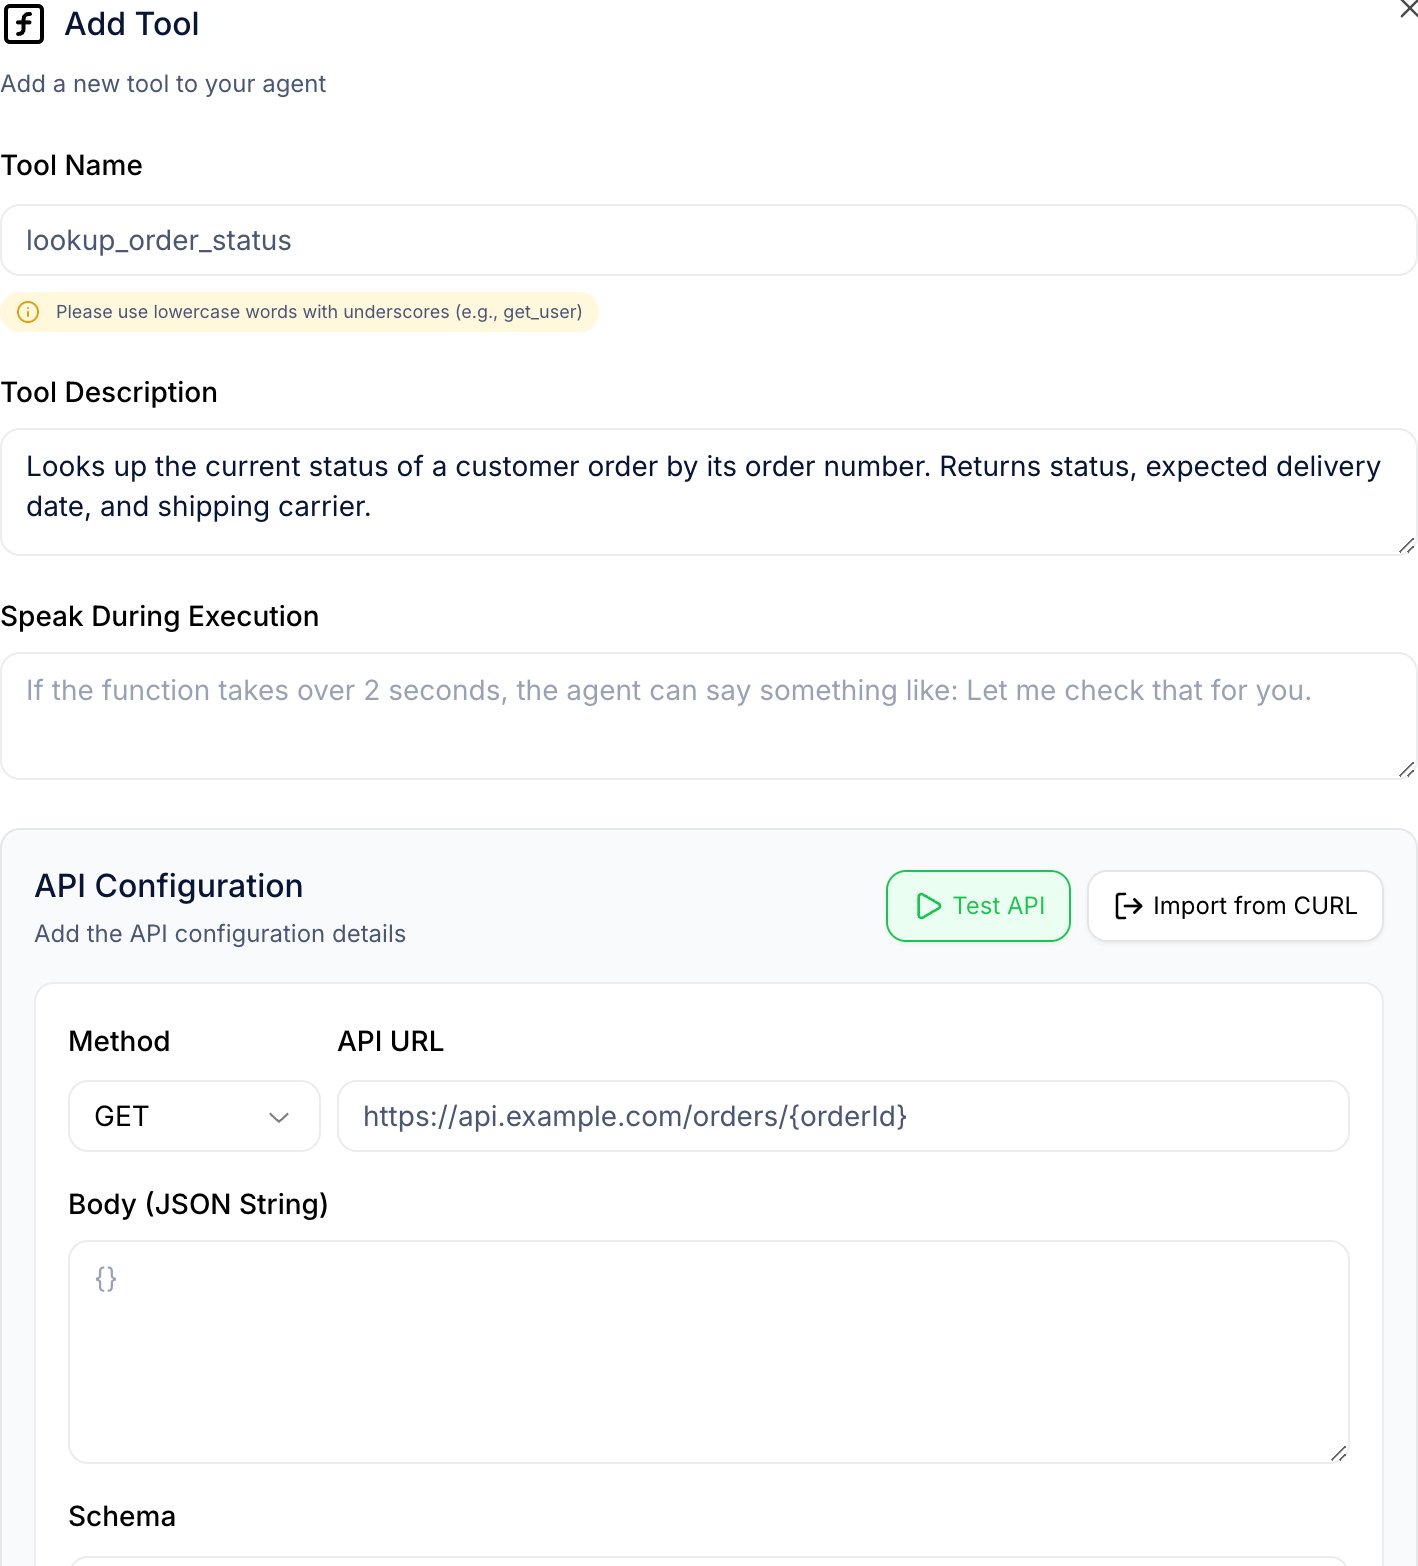
Create Tool modal — API Tool selected. Name and description are the two highest-leverage fields.
Step 3: Configure the HTTP request
Below the basics you’ll see the request configuration:- URL — full HTTPS URL. May contain
{placeholders}that Agntix fills from the schema you define in Step 4 (e.g.https://api.example.com/orders/{orderId}). - Method —
GET,POST,PUT,PATCH,DELETE. - Body — JSON template (for non-GET methods). Placeholders work here too.
- Headers — key/value pairs. Common pattern:
Authorization: Bearer {YOUR_TOKEN}. - Query Params — key/value pairs appended to the URL.
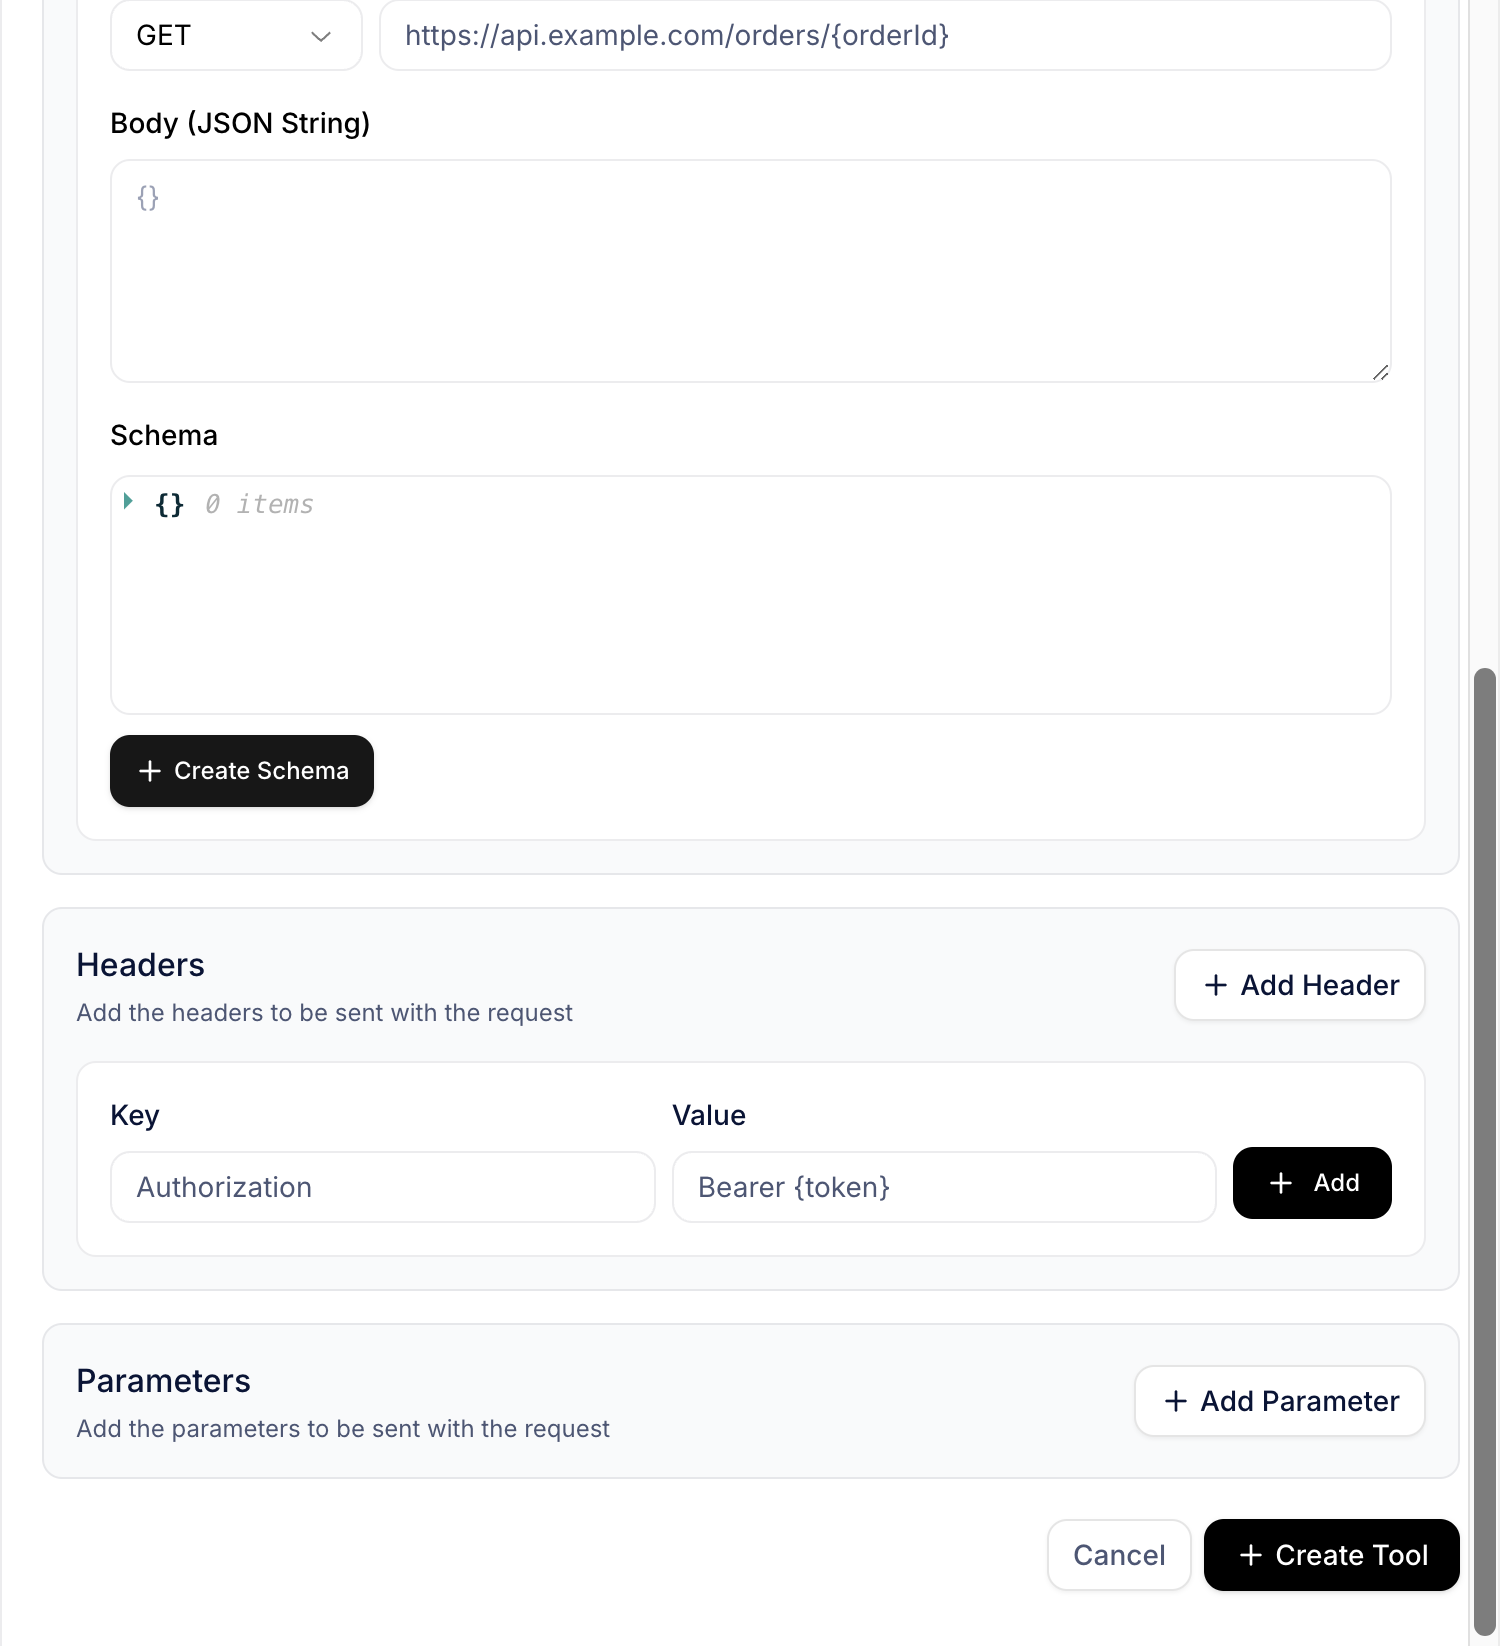
Headers / params editor. Use the Add button to append rows; values can reference placeholders from your schema.
Step 4: Define the input schema
The LLM needs to know which arguments to pass when calling the tool. Click Schema Builder to open the visual editor, or paste a JSON Schema directly. For the order-status example: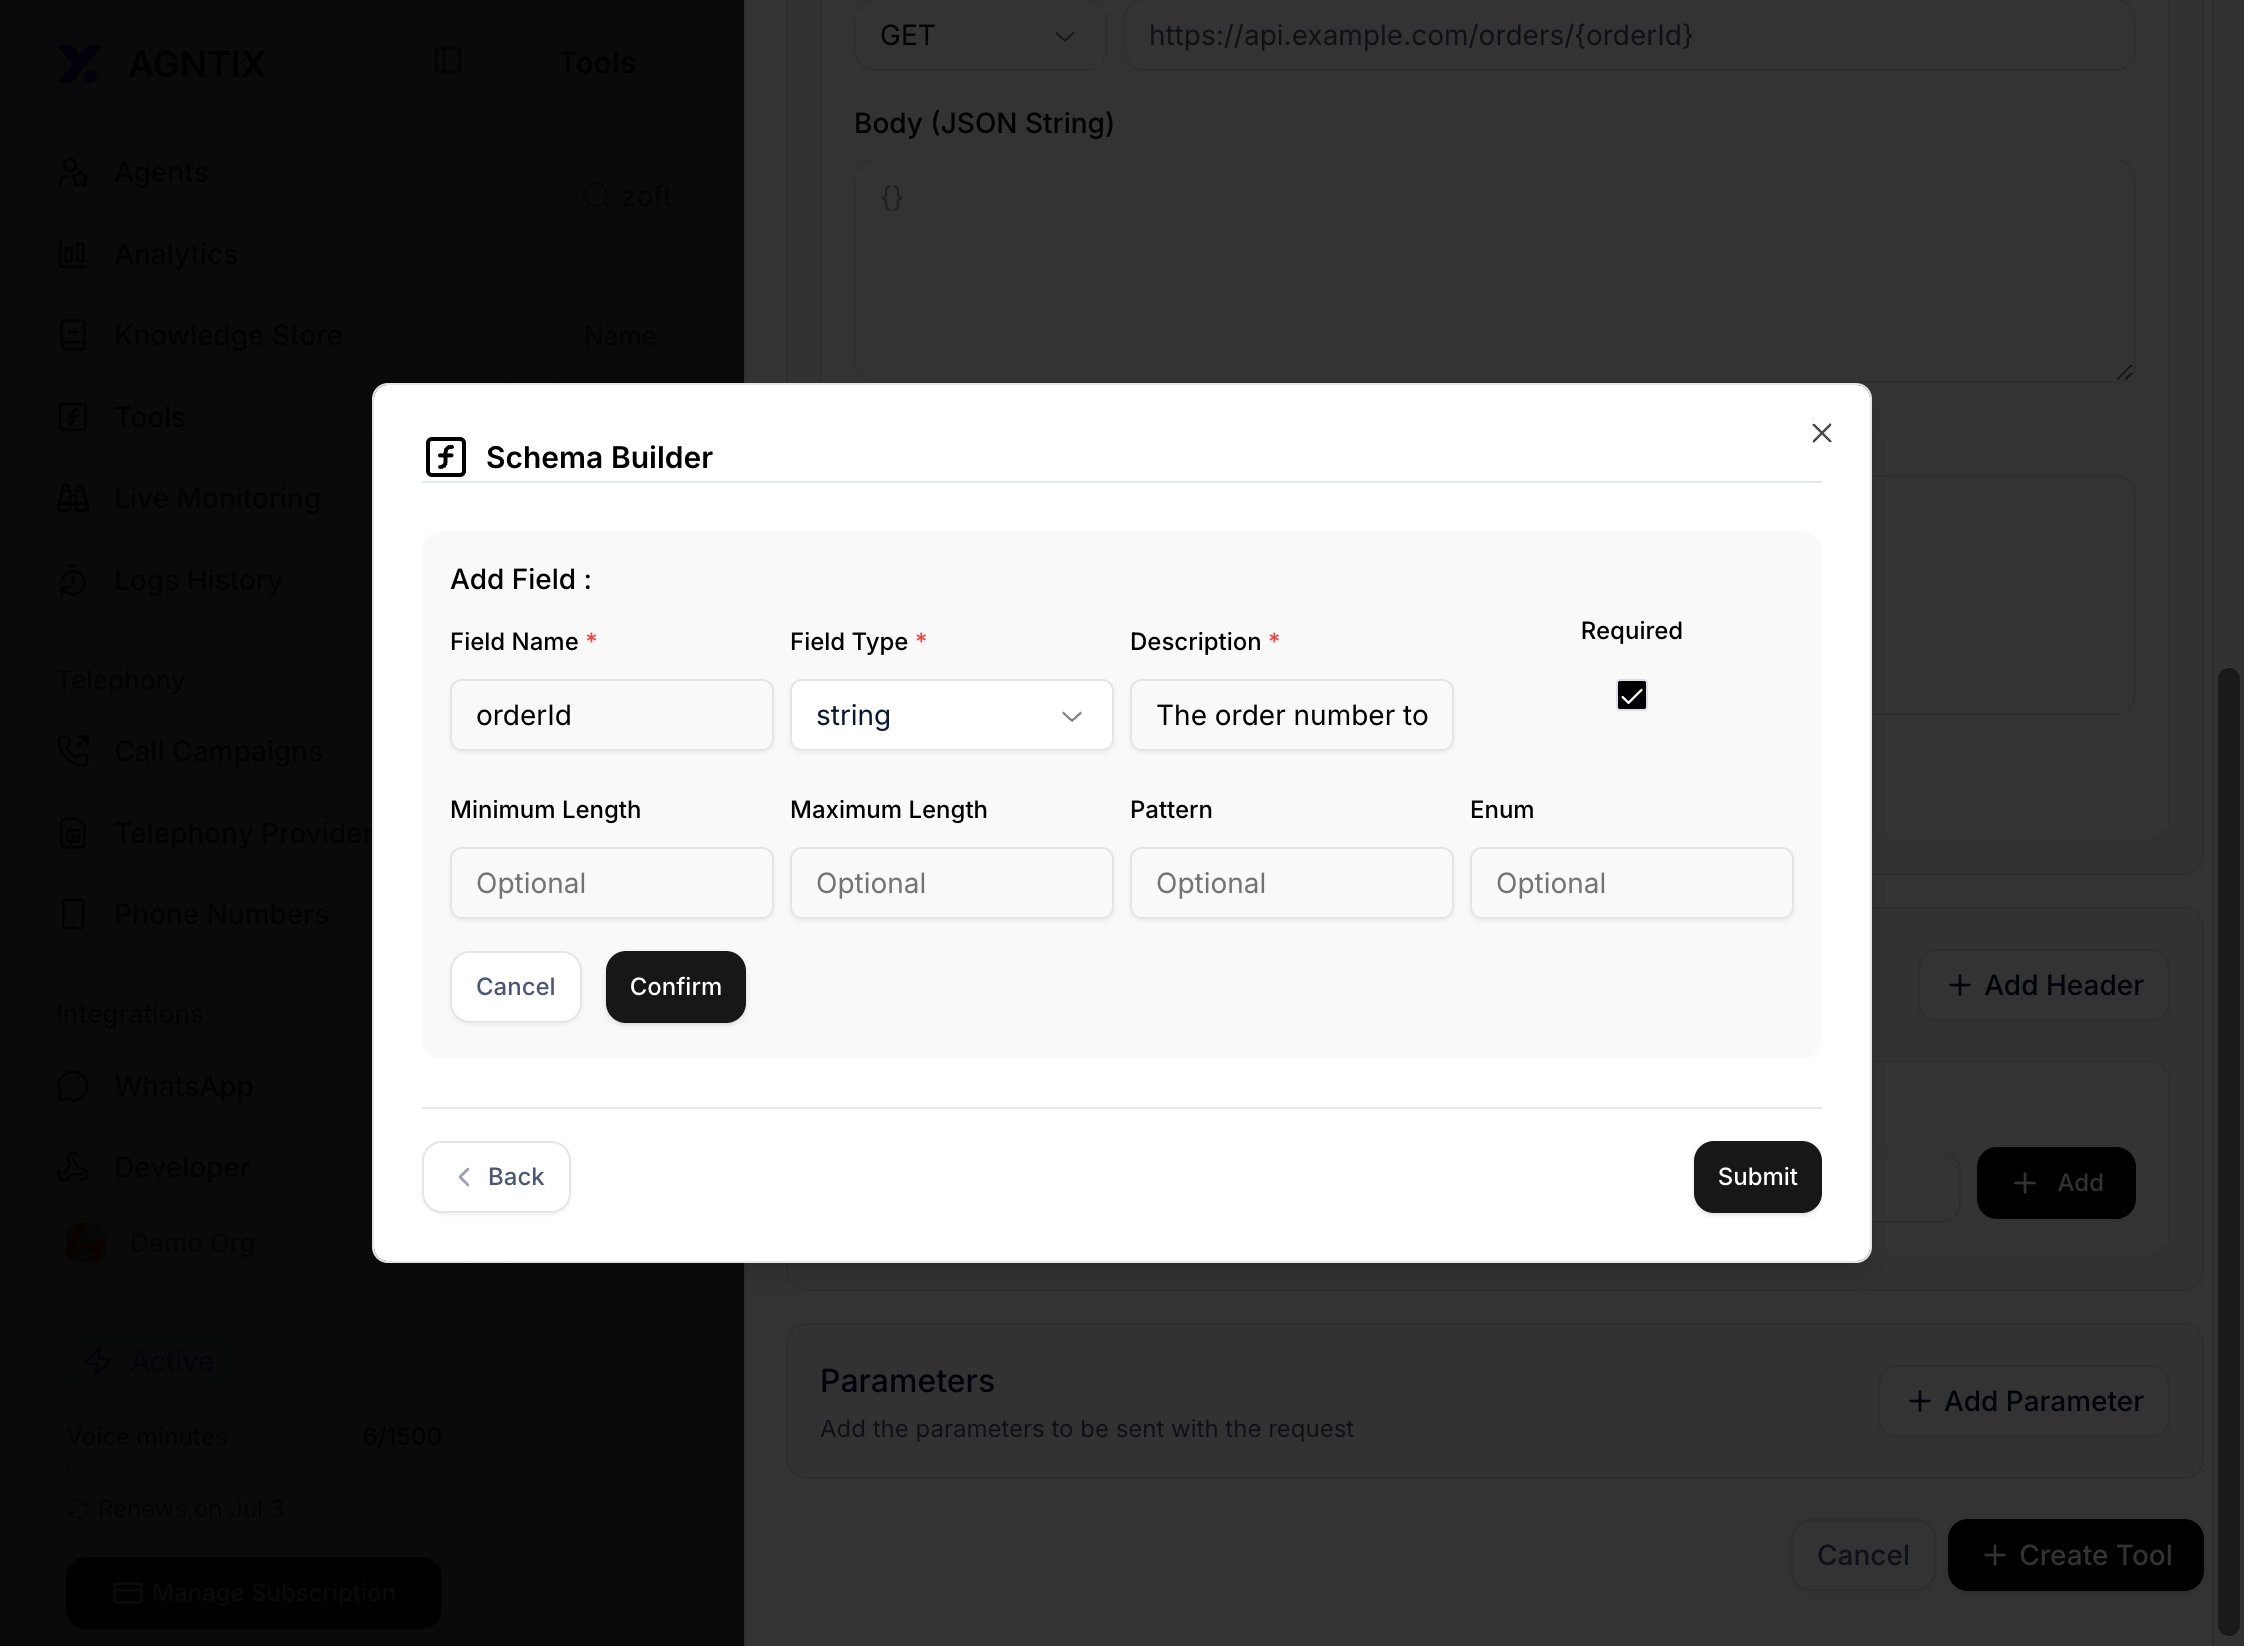
Schema Builder — visual editor for the AJV/JSON Schema the LLM sees. Mark fields as required so the LLM doesn't call the tool without them.
{orderId} in the URL) now map to schema properties.
Step 5: Test the API
Before saving, click Test API in the modal. A side sheet opens where you can fill in sample values for each schema property and fire a real request against your endpoint.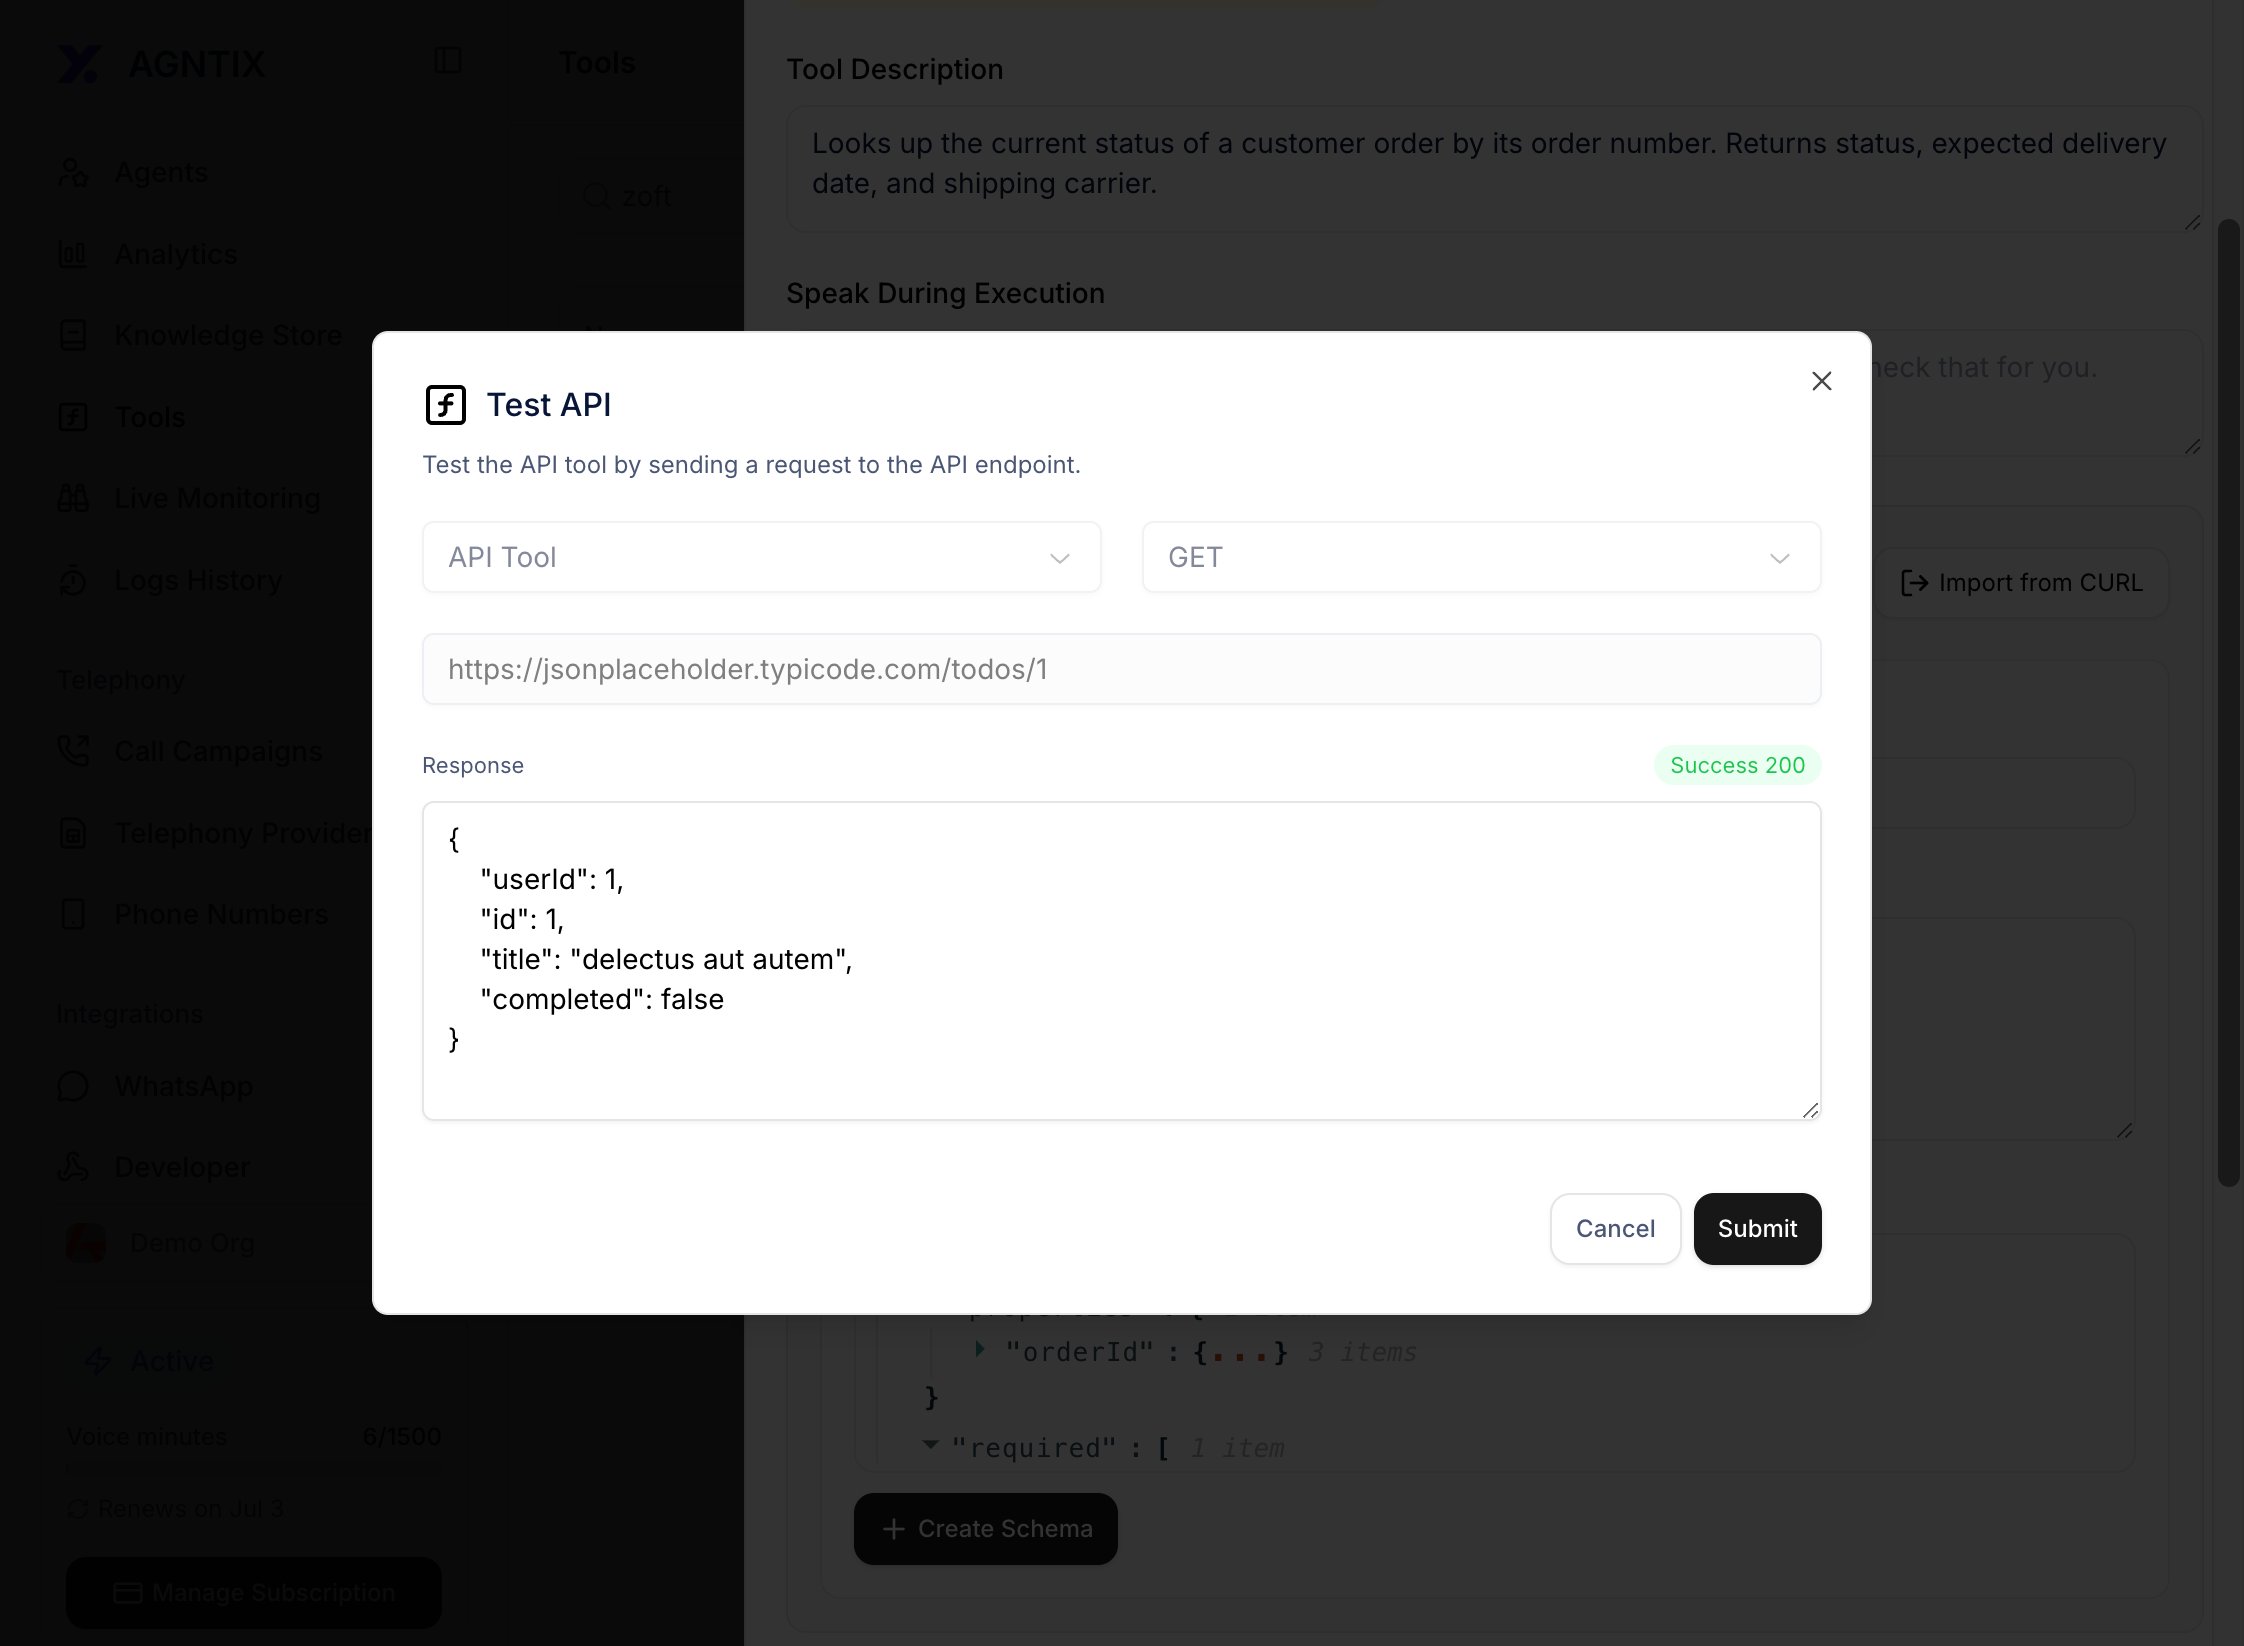
Test API side sheet — sample values on the left, response on the right. Use this to verify auth, request shape, and response payload before exposing the tool to your agent.
Step 6: Attach the tool to an agent
Open your agent at/agents/{id}. Switch to the Functions tab on the right side.
The tab shows two groups:
- Built-in functions — toggle on for End Call, Transfer Call, Voicemail detection. These are pre-configured; you only pick when they fire.
- Custom Tools — click + Add to attach your newly-created tool. You can attach multiple.

Functions tab — your custom tool listed under Custom Tools after attaching.
Step 7: Verify the tool fires
Click Test Agent in the page header. Send a message that should obviously trigger the tool — for the order-status example:“What’s the status of order ORD-1234?”In the test panel you’ll see three things in sequence:
- The user message you sent.
- A tool call entry —
lookup_order_statusinvoked with{"orderId": "ORD-1234"}. - The assistant’s final reply, incorporating the tool’s response.

Test Agent transcript — tool call visible with its arguments and the API response.
TOOL message with full payload.
Verify it works
- The tool appears in the
/toolslist with the correct name and type. - The agent’s Functions tab shows the tool selected after saving.
- A test message that should trigger the tool actually fires the HTTP request (check your server logs).
- The agent’s final reply uses information from the tool’s response.
Troubleshooting
Function tools
For end call / transfer call / voicemail detection, you don’t need to build an API. Open the agent’s Functions tab and toggle the built-in function on — Agntix handles the implementation. Configure conditions (e.g. transfer destination phone number) in the same panel.API alternative
Same flow over HTTP:Common next steps
Streaming events
Watch tool calls live from your backend.
Voice calls
Tools work the same way over voice — with tighter latency budgets.
Webhooks
Get notified server-side when a tool fires.
Knowledge stores
Pair tools with RAG for the strongest agents.