Prerequisites
- A signed-in dashboard account at app.agntix.ai. Sign up takes about 30 seconds; the default plan includes enough free quota to finish this guide.
- Admin role on your organization (Member accounts can view agents but not create them).
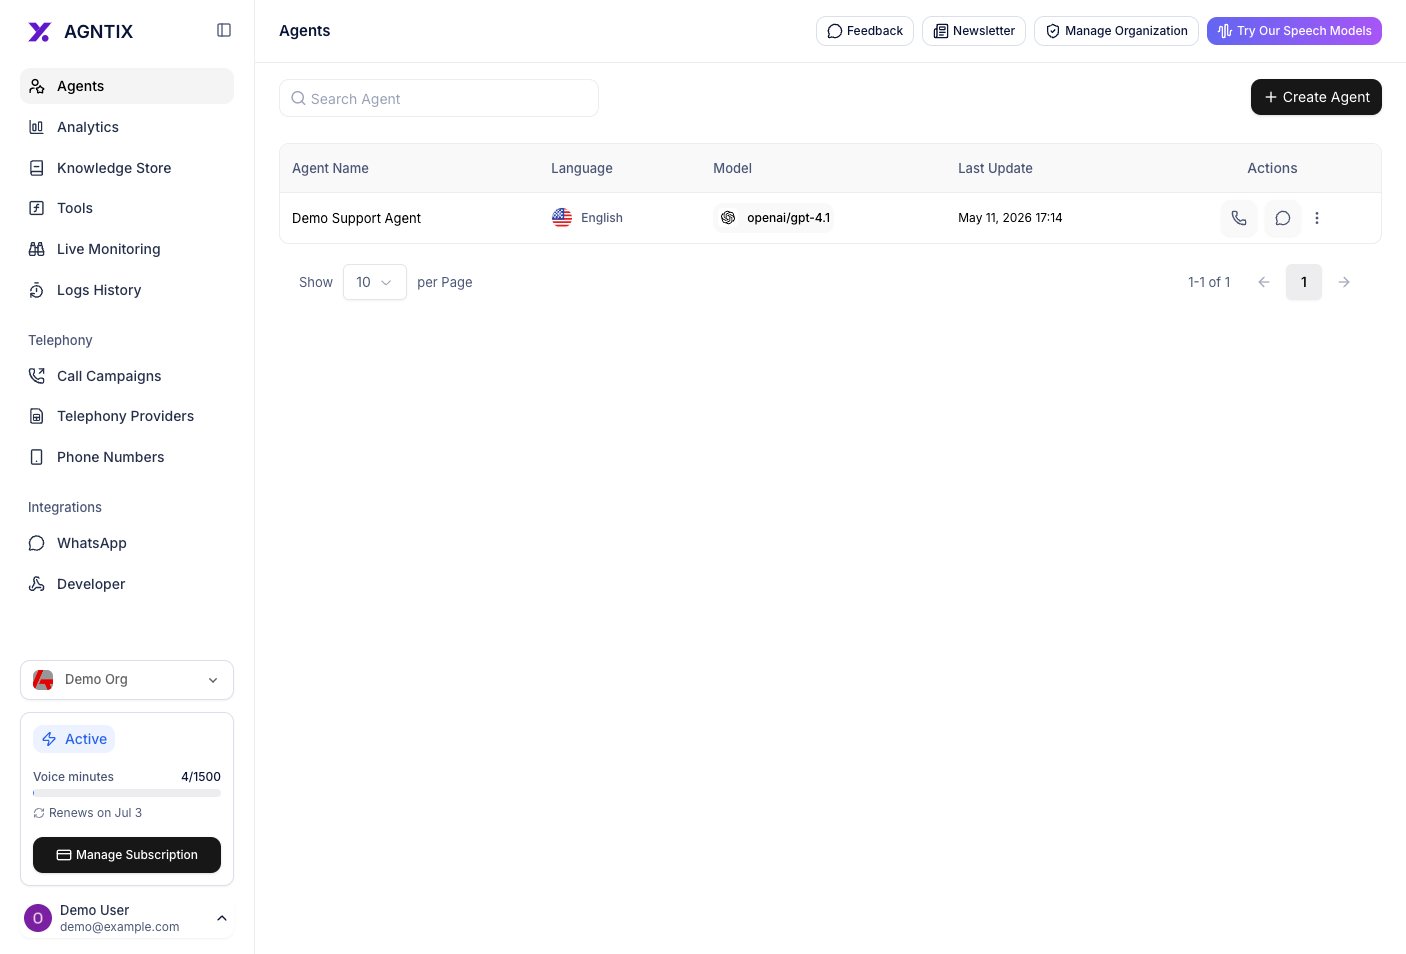
Step 1: Open the Agents page
From the left navigation, click Agents. You’ll land on/agents, which lists every agent in your organization. New organizations start empty.
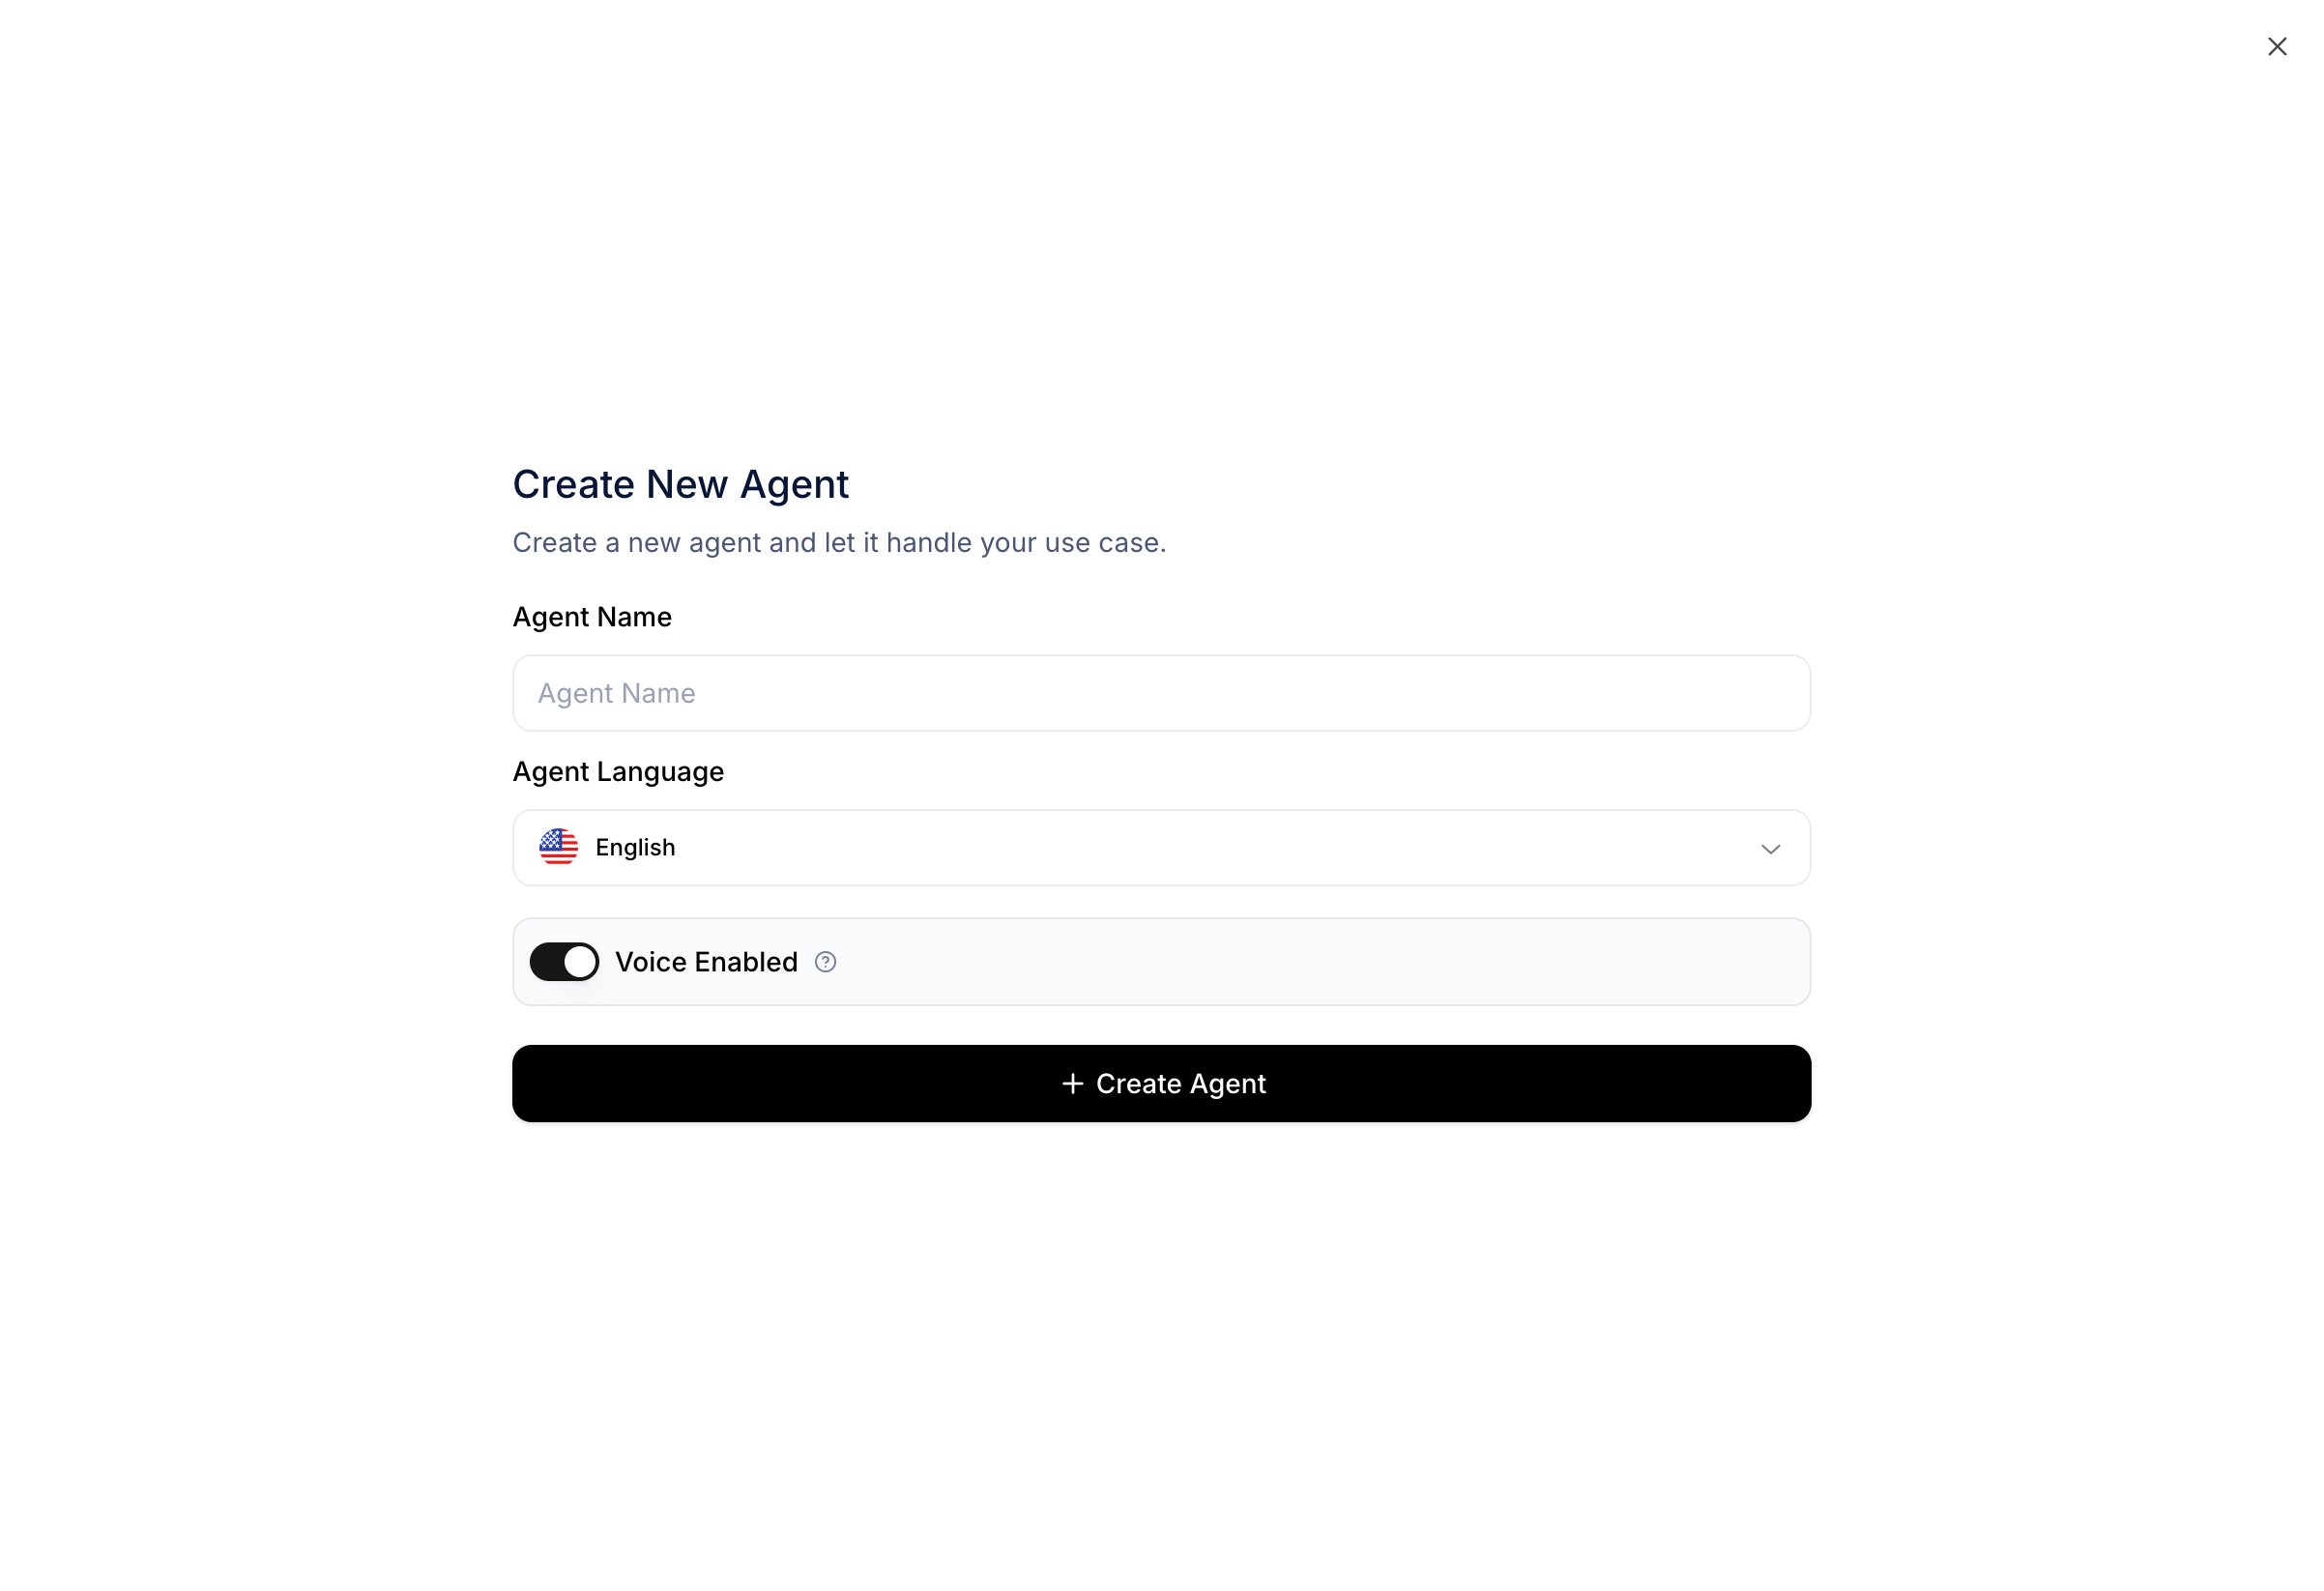
Step 2: Create the agent
The Create New Agent dialog asks for just three things — everything else is configured after the agent exists:- Name — at least 5 characters. Shown in lists, logs, and webhooks.
- Language — the agent’s primary language. Agntix uses it to pick sensible default text, speech-to-text, and text-to-speech models for you.
- Voice Enabled — on by default. Leave it on if the agent will make/receive phone or browser calls; turn it off for a chat-only agent. You can flip this later — see Voice calls.
/agents/{id}, the agent detail / edit page.
Creation is a single step today — there’s no multi-step template wizard. The system prompt, tools, and other settings are all configured on the detail page once the agent exists (next step).
Step 3: Configure the agent
The detail page has two columns:- Left — the System Prompt, model, and language. A new agent starts with a placeholder prompt (“This is a blank template, update the system prompt to fit your needs”) — replace it with your own. Use the expand icon at the top-right of the textarea for a full-screen editor on longer prompts.
- Right — tabs for Calls, Chat, Behavior, Functions, Multi-agents, Analytics, and Widgets. Each tab configures one slice of the agent.
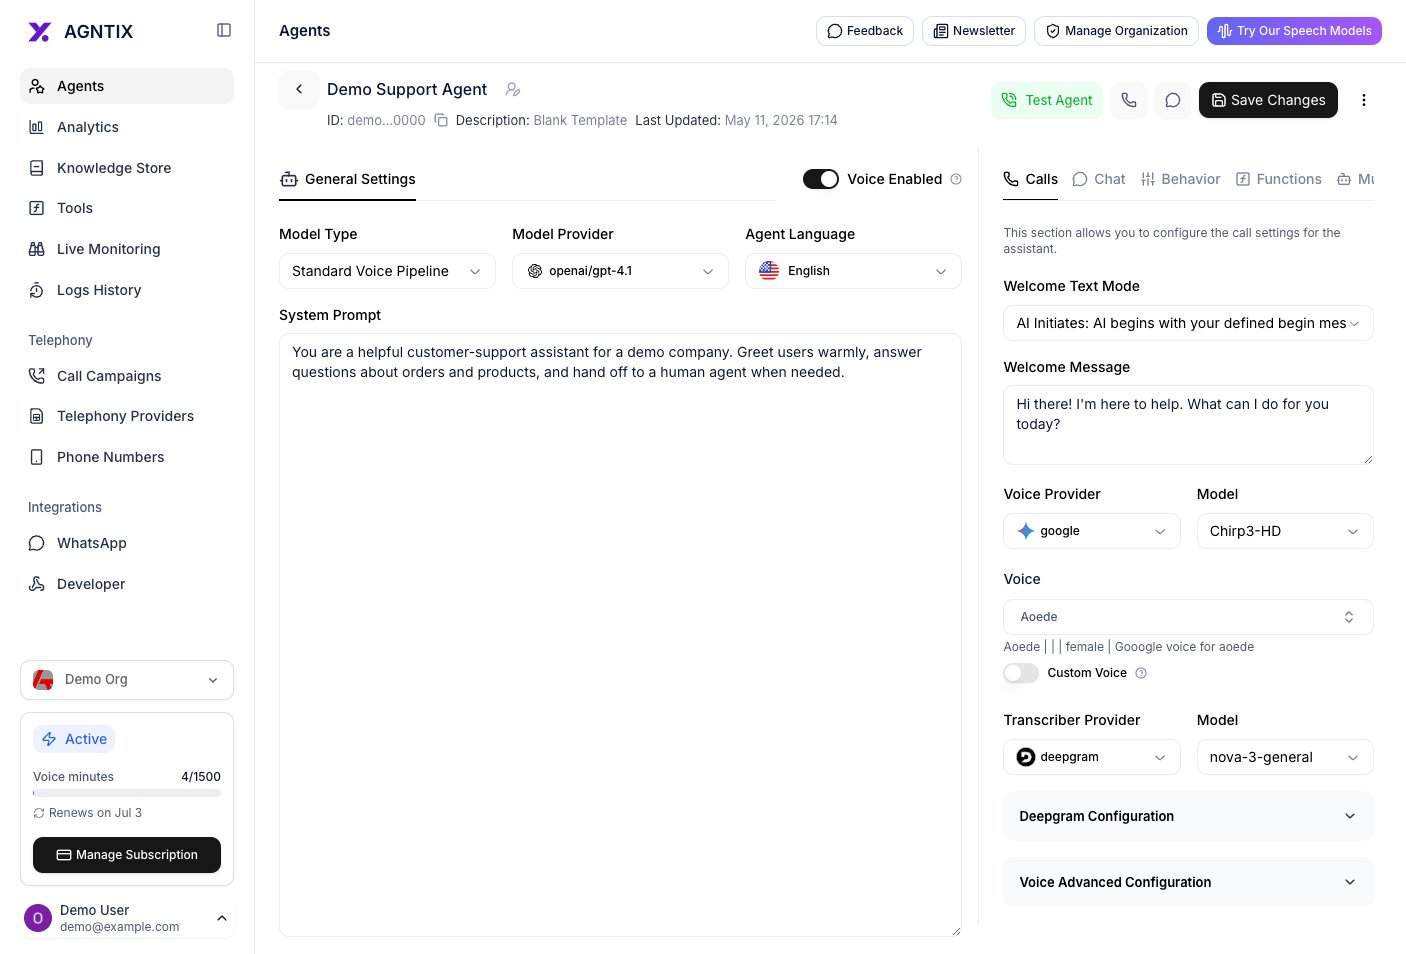
Step 4: Test the agent
In the header you’ll see a green Test Agent button.
- Phone icon — opens the SDK voice demo for this agent.
- Speech-bubble icon — opens the SDK chat demo for this agent.
Verify it works
Your agent is wired up if all of the following are true:- It appears at
/agentswith the correct name and Updated At timestamp. - Clicking Test Agent opens a working test panel without errors.
- The agent’s replies follow the system prompt you saved (correct persona, refuses out-of-scope questions).
- The Analytics tab on the detail page starts collecting session data after your first test.
Common next steps
Add knowledge (RAG)
Ground the agent’s answers in your own documents.
Enable voice
Same agent — now over the browser or PSTN.
Give it tools
Let the agent call your APIs and built-in functions.
Subscribe to webhooks
Push session lifecycle events to your back-office.